JavaFXطريقة إضافة أيقونة للـ Button مع تحديد مكان ظهورها
المثال التالي يعلمك طريقة إضافة أيقونة للـ Button مع تحديد مكان ظهورها.
ملاحظة: عليك إنشاء مجلد و وضع الأيقونة التي تريد وضعها لكل Button كما في الصورة التالية.
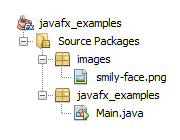
الصورة توضح أننا أضفنا مجلد إسمه images و وضعنا فيه صورة إسمها smily-face.png.
مثال
import javafx.application.Application; import javafx.scene.Group; import javafx.scene.Scene; import javafx.scene.control.ContentDisplay; import javafx.scene.control.Button; import javafx.scene.image.Image; import javafx.scene.image.ImageView; import javafx.stage.Stage; public class Main extends Application { public void start(Stage stage) { // يمثل الصورة التي سنضعها كأيقونة Image هنا قمنا بإنشاء كائن من الكلاس Image image = new Image(getClass().getResourceAsStream("/images/smily-face.png")); // مع وضع نص و أيقونة لكل كائن منهم Button هنا قمنا بإنشاء 7 كائنات من الكلاس Button button_1 = new Button("Button 1", new ImageView(image)); Button button_2 = new Button("Button 2", new ImageView(image)); Button button_3 = new Button("Button 3", new ImageView(image)); Button button_4 = new Button("Button 4", new ImageView(image)); Button button_5 = new Button("Button 5", new ImageView(image)); Button button_6 = new Button("Button 6", new ImageView(image)); Button button_7 = new Button("Button 7", new ImageView(image)); // قمنا بإنشائه Button هنا قمنا بتحديد مكان ظهور الأيقونة بالنسبة لكل button_1.setContentDisplay(ContentDisplay.LEFT); // هنا وضعنا الصورة يسار النص button_2.setContentDisplay(ContentDisplay.RIGHT); // هنا وضعنا الصورة يمين النص button_3.setContentDisplay(ContentDisplay.GRAPHIC_ONLY); // هنا قمنا بإظهار الصورة فقط button_4.setContentDisplay(ContentDisplay.TOP); // هنا وضعنا الصورة فوق النص button_5.setContentDisplay(ContentDisplay.BOTTOM); // هنا وضعنا الصورة تحت النص button_6.setContentDisplay(ContentDisplay.CENTER); // هنا وضعنا النص على الصورة button_7.setContentDisplay(ContentDisplay.TEXT_ONLY); // هنا بإظهار النص فقط // في النافذة button_1 هنا قمنا بتحديد مكان ظهور الكائن button_1.setTranslateX(30); button_1.setTranslateY(50); // في النافذة button_2 هنا قمنا بتحديد مكان ظهور الكائن button_2.setTranslateX(170); button_2.setTranslateY(50); // في النافذة button_3 هنا قمنا بتحديد مكان ظهور الكائن button_3.setTranslateX(310); button_3.setTranslateY(50); // في النافذة button_4 هنا قمنا بتحديد مكان ظهور الكائن button_4.setTranslateX(30); button_4.setTranslateY(130); // في النافذة button_5 هنا قمنا بتحديد مكان ظهور الكائن button_5.setTranslateX(120); button_5.setTranslateY(130); // في النافذة button_6 هنا قمنا بتحديد مكان ظهور الكائن button_6.setTranslateX(210); button_6.setTranslateY(130); // في النافذة button_7 هنا قمنا بتحديد مكان ظهور الكائن button_7.setTranslateX(300); button_7.setTranslateY(130); // في النافذة Root Node لأننا ننوي جعله الـ Group هنا قمنا بإنشاء كائن من الكلاس Group root = new Group(); // root في الكائن Buttons هنا قمنا بإضافة جميع الـ root.getChildren().add(button_1); root.getChildren().add(button_2); root.getChildren().add(button_3); root.getChildren().add(button_4); root.getChildren().add(button_5); root.getChildren().add(button_6); root.getChildren().add(button_7); // فيها و تحديد حجمها Node كأول root هنا قمنا بإنشاء محتوى النافذة مع تعيين الكائن Scene scene = new Scene(root, 400, 250); // هنا وضعنا عنوان للنافذة stage.setTitle("JavaFX Button"); // أي وضعنا محتوى النافذة الذي قمنا بإنشائه للنافذة .stage في كائن الـ scene هنا وضعنا كائن الـ stage.setScene(scene); // هنا قمنا بإظهار النافذة stage.show(); } // هنا قمنا بتشغيل التطبيق public static void main(String[] args) { launch(args); } }
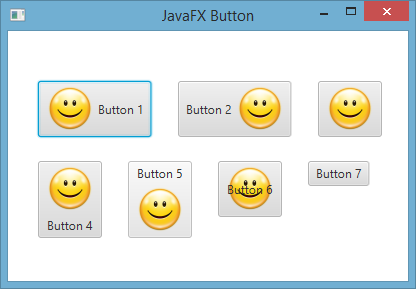
ستظهر لك النافذة التالية عند التشغيل.