Programming Basics SQL HTML CSS JavaScript React Python C++ Java JavaFX Swing Problem Solving English English Conversations Computer Fundamentals Linux Learn Typing

JavaFXريقة تغيير لون خلفية الـButton

المثال التالي يعلمك طريقة تغيير لون خلفية الـ Button.


مثال

Main.java
import javafx.application.Application;
import javafx.geometry.Insets;
import javafx.scene.Group;
import javafx.scene.Scene;
import javafx.scene.control.Button;
import javafx.scene.layout.Background;
import javafx.scene.layout.BackgroundFill;
import javafx.scene.layout.CornerRadii;
import javafx.scene.paint.Color;
import javafx.scene.text.Font;
import javafx.stage.Stage;
public class Main extends Application {
@Override
public void start(Stage stage) {
// يمثل الزر الذي نريد إضافته في النافذة Button هنا قمنا بإنشاء كائن من الكلاس
Button button = new Button("Black Button");
// في النافذة button هنا قمنا بتحديد مكان ظهور الكائن
button.setTranslateX(130);
button.setTranslateY(100);
// button هنا قمنا بتغيير نوع و حجم خط الكائن
button.setFont(new Font("Arial", 20));
// button هنا قمنا بتغيير لون خط الكائن
button.setTextFill(Color.CYAN);
// button هنا قمنا بتغيير لون خلفية الكائن
button.setBackground(new Background(new BackgroundFill(Color.BLACK, new CornerRadii(5), Insets.EMPTY)));
// في النافذة Root Node لأننا ننوي جعله الـ Group هنا قمنا بإنشاء كائن من الكلاس
Group root = new Group();
// root في الكائن button هنا قمنا بإضافة الكائن
root.getChildren().add(button);
// فيها و تحديد حجمها Node كأول root هنا قمنا بإنشاء محتوى النافذة مع تعيين الكائن
Scene scene = new Scene(root, 400, 250);
// هنا وضعنا عنوان للنافذة
stage.setTitle("JavaFX Button");
// أي وضعنا محتوى النافذة الذي قمنا بإنشائه للنافذة .stage في كائن الـ scene هنا وضعنا كائن الـ
stage.setScene(scene);
// هنا قمنا بإظهار النافذة
stage.show();
}
// هنا قمنا بتشغيل التطبيق
public static void main(String[] args) {
launch(args);
}
}
import javafx.application.Application; import javafx.geometry.Insets; import javafx.scene.Group; import javafx.scene.Scene; import javafx.scene.control.Button; import javafx.scene.layout.Background; import javafx.scene.layout.BackgroundFill; import javafx.scene.layout.CornerRadii; import javafx.scene.paint.Color; import javafx.scene.text.Font; import javafx.stage.Stage; public class Main extends Application { @Override public void start(Stage stage) { // يمثل الزر الذي نريد إضافته في النافذة Button هنا قمنا بإنشاء كائن من الكلاس Button button = new Button("Black Button"); // في النافذة button هنا قمنا بتحديد مكان ظهور الكائن button.setTranslateX(130); button.setTranslateY(100); // button هنا قمنا بتغيير نوع و حجم خط الكائن button.setFont(new Font("Arial", 20)); // button هنا قمنا بتغيير لون خط الكائن button.setTextFill(Color.CYAN); // button هنا قمنا بتغيير لون خلفية الكائن button.setBackground(new Background(new BackgroundFill(Color.BLACK, new CornerRadii(5), Insets.EMPTY))); // في النافذة Root Node لأننا ننوي جعله الـ Group هنا قمنا بإنشاء كائن من الكلاس Group root = new Group(); // root في الكائن button هنا قمنا بإضافة الكائن root.getChildren().add(button); // فيها و تحديد حجمها Node كأول root هنا قمنا بإنشاء محتوى النافذة مع تعيين الكائن Scene scene = new Scene(root, 400, 250); // هنا وضعنا عنوان للنافذة stage.setTitle("JavaFX Button"); // أي وضعنا محتوى النافذة الذي قمنا بإنشائه للنافذة .stage في كائن الـ scene هنا وضعنا كائن الـ stage.setScene(scene); // هنا قمنا بإظهار النافذة stage.show(); } // هنا قمنا بتشغيل التطبيق public static void main(String[] args) { launch(args); } }

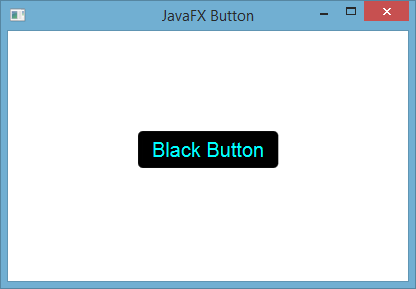
ستظهر لك النافذة التالية عند التشغيل.

طريقة تغيير لون button و إضاقة هامش حوله في javafx